or this?
well, let's start at the beginning:
Making a Fabric Rosette
Materials:
1. scissors
2. hot glue gun/glue sticks
3. small piece of coordinating felt
4. fabric (many types will work)
step 1: cut out a rectangular strip of fabric. it can be any size you want, but keep in mind that the longer the fabric, the bigger the flower will be in circumference.
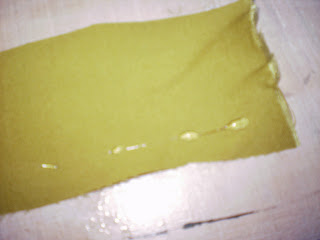
step 2: put dots of glue along one side of the fabric (along the long edge) and fold edges together to make a fabric tube. you could also sew this if you prefer.
step 3: tie a knot at the end of the tube
step 4: cut off the end right after the knot
step 5: now comes the step where you need some nimble fingers. with the knot side in the middle, twist the fabric to form a snail-like circle. every few twists, stop and tab a bit of glue to hold it together.
continue twisting and gluing until the entire piece of fabric is secure. fold and glue the end under the rest of the flower to hide it better.
step 6: add accessories. you can glue the rosette to additional coordinating pieces of fabric as a background, add pearls, buttons, etc.
step 7: cut out a circle of felt that is a little smaller than the size of the flower. glue this to the bottom and use as a base to attach to a hair clip, necklace bib, or headband, etc. you want to make sure to trim the felt so that it cannot be seen.
you did it! the uses for this fabric rosette are endless. enjoy creating pretty accessories using your handmade rosettes!
once you can make the rosette, you can make the bib necklace. that tutorial will be coming soon!
********************************************************************


No comments:
Post a Comment